
Wednesday, October 13, 2010
EXAMPLE: Long Exposure + Strobe

Sunday, October 10, 2010
READING: Senegal
This blog post is about another blog post from the Times' photography blog, Lens. The article is Senegal's Changing Urban Landscape. The photographer, a Sicilian man named Mimi Mollica, used medium format color film. There is a brief accompanying article discussing his goals for the project. He wanted to portray a different Africa than the usual depictions of war-torn Africa. The images are beautiful. The blog wouldn't let me pull images from the slideshow, but here are some from the article:

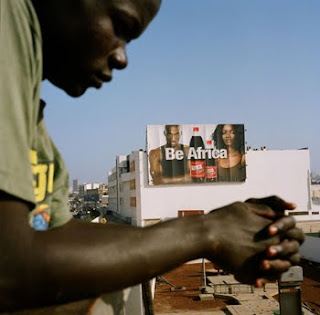
Some of the other images are beautiful and I would recommend looking at them at the link above.
Friday, October 8, 2010
PROJECT 2
Here's our second project rotation Oct 4 - Nov 4
- Alternative Photography - Anna
- Large Format Camera - LeeAnne
- Medium Format Cameras - Laura
- Digital SLR & RAW Format - Phil
- Biography Comparing Two Photographers - Kevin
- Event Photography - Craig
Thursday, October 7, 2010
PROJECT 1: Medium Format
This rotation I used a medium format Hasselblad. I really liked the viewfinder which was on the top side of the camera, so I could look down at the photo rather than holding the camera up to my eye. It was a little difficult to focus, but the high quality image I got when I did manage to focus it was worth it. I had some trouble with loading my film, sotwo rolls I shot weren't recorded. Another roll was somehow exposed to light and messed up. I liked some of my ideas so I might come back to them later in the year.


These are two of my contact sheets. In one I focused mostly on portraits and in the other on natural shots of Menlo. I also have two others not pictured, both of shadows on balloons.
This first shot is part of a series I took of shadows on balloons. The second one is a portrait. I photoshopped both of them to correct the color and contrast.
This photo is also part of the series of balloon shadows. The colors look pretty different because of the way I photoshopped them.
EXAMPLE: Creative Portrait Ideas
I noticed a couple of interesting ideas for portraits that you could try to use or adapt.

TV show advertisement featuring 2 faces, though the same face shown in this way might be even more interesting.

Separate closeups arranged in the shape of the body.

Here's the concept in the form of a diagram.

Use of a Lens Baby to shift/tilt focus as shown in this example from Craig Tanner's Light Diary.

Chuck Close style close up and symmetric lighting with very shallow depth of field.

Nice example by Ela Hawes using multiple exposure and moody, dramatic lighting on the face. Most likely this was assembled from multiple images in Photoshop.

TV show advertisement featuring 2 faces, though the same face shown in this way might be even more interesting.

Separate closeups arranged in the shape of the body.

Here's the concept in the form of a diagram.

Use of a Lens Baby to shift/tilt focus as shown in this example from Craig Tanner's Light Diary.

Chuck Close style close up and symmetric lighting with very shallow depth of field.

Nice example by Ela Hawes using multiple exposure and moody, dramatic lighting on the face. Most likely this was assembled from multiple images in Photoshop.
Wednesday, October 6, 2010
ROTATION 1: Large Format - Finishing Up
This week, we finished up our first rotation (mine being the large format view camera).
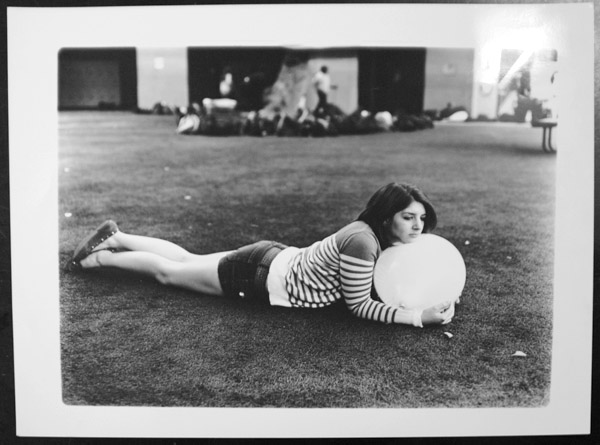
In this rotation, I primarily worked with balloons, but also experimented with what I call partial exposures and adjusting the plane of focus of the camera.
Overall, working with the view camera is very rewarding, because it is a very mechanical and visceral process. The camera is not as automated as the SLRs we worked with in Beginning Photography, which slows the photo-taking process down - which is beneficial in that it makes the photographer pause to further contemplate their photo, but makes the photography process somewhat more difficult as well, in that the photographer gets fewer chances in a given period of time to get a successful photo.
Below are a few samples of the various work I did. (I have not included the partial exposures because I posted them in Polaroid format a few blog posts back)

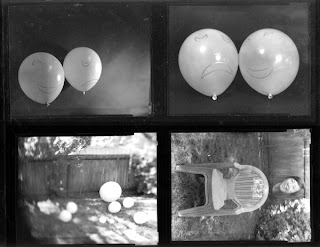
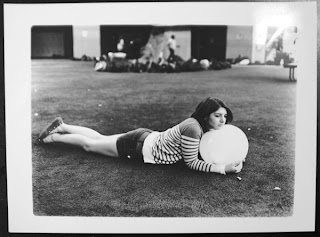
-Kevin
In this rotation, I primarily worked with balloons, but also experimented with what I call partial exposures and adjusting the plane of focus of the camera.
Overall, working with the view camera is very rewarding, because it is a very mechanical and visceral process. The camera is not as automated as the SLRs we worked with in Beginning Photography, which slows the photo-taking process down - which is beneficial in that it makes the photographer pause to further contemplate their photo, but makes the photography process somewhat more difficult as well, in that the photographer gets fewer chances in a given period of time to get a successful photo.
Below are a few samples of the various work I did. (I have not included the partial exposures because I posted them in Polaroid format a few blog posts back)

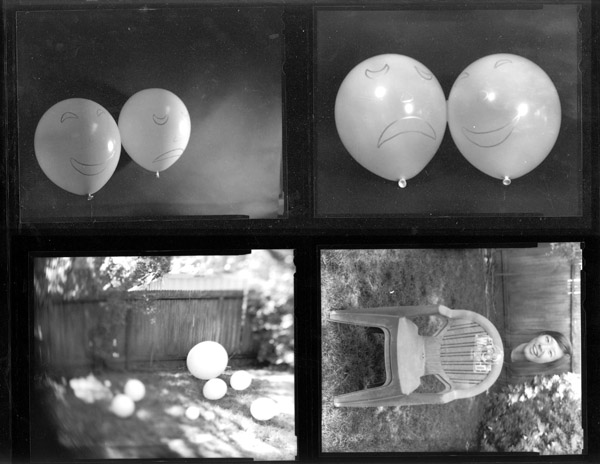
-Kevin
READING: Cell Phone Photography
Do you think of your cell phone as a viable camera for making artful pictures?

Perhaps we should... Take a look at what these professional photographers are saying and doing with their cell phone cameras.

Perhaps we should... Take a look at what these professional photographers are saying and doing with their cell phone cameras.
PROJECT 1: Biogaphy - Similar Yet Different

This week, we looked at two famous up and coming photographers, Platon and Rankin. Both are photographer from the UK, who specialize in advertisement, and especially portraiture. Although similarities can be drawn between the two photographers in their purpose, and some of their work, the techniques they use are vastly different.
Platon's style is more subtle, focusing more on the whole face of the person, usually with a single colored, or at least very basic background. Platon is also famous for his use of wide angle lenses up close. Simple as his photographs may be, the emotions evoked are powerful and makes the viewer examine every aspect of the photo.

Rankin's loud and "in your face" style catches the eyes of many, and his photographs prove to be excellent advertisement material. As apposed to Platon, Rankin uses many colors and props to make the viewer not only focus on the person, or main subject, but other aspects of the photo that he deliberately uses to attract attention.
Check out both
of these photographers work at their websites:
http://rankin.co.uk/
http://www.platonphoto.com/
Sunday, October 3, 2010
PROJECT 1: Speech Balloons!


I'm super happy with the way these turned out! My only qualm is the one with Meredie where it's a bit fuzzy, but I think I might just add a blur overlay and the same to Stephanie's picture so it looks a bit more intentional. :D I think I might end up using these in the exihibit later this month.
PROJECT 1: Alternative Process
Finally my liquid emulsion experiment has worked. Now all I need to do is complete my project with the toilet seat. Almost done. It is so close. It took lots of trial and error to realize how to work with liquid emulsion, but now that hard part is over. What Mr. Zivkov and I realized is that the red safety light in the darkroom was too bright for the liquid emulsion -- causing to turn black when we would develop our test prints. So now all the prep work with the emulsion is done in complete darkness.
Subscribe to:
Posts (Atom)